A highly targeted phishing campaign has been hitting hotel guests across Luxembourg. Originally flagged by the Computer Incident Response Center Luxembourg (CIRCL), this campaign stands out not because of advanced malware, but because of its impeccable contextual credibility . Threat actors aren't guessing targets; they are hitting actual hotel guests on WhatsApp with exact, legitimate booking details to steal credit card data. As part of a technical review into the infrastructure, we analyzed a recent Indicator of Compromise (IoC) linked to this campaign: [https://stay-hotel607923.com](https://stay-hotel607923.com) . Here is the deep dive into how this attack works, the infrastructure behind it, and how to track it. The Attack Workflow: Smishing with Context Most phishing campaigns rely on volume, hoping a small fraction of a massive email list bites. This campaign relies on precision. The Data Exposure: CIRCL assesses that the campaign's source data may originate from servi...
Static code analysis
In this write-up, we’ll load the binary file into IDA (free version) to disassemble it and do a static code analysis. And where to being then…
Start
Ok, I’ve loaded the binary file into IDA:

So we can see it calls a subroutine (aka function) sub_401000:
; Input SHA256 : 807126CBAE47C03C99590D081B82D5761E0B9C57A92736FC8516CF41BC564A7D
; Input MD5 : ABA2D86ED17F587EB6D57E6C75F64F05
; Input CRC32 : 7944603FFormat : Portable executable for 80386 (PE)
; Imagebase : 400000
; Timestamp : 56B664A6 (Sat Feb 06 21:24:54 2016)
; Section 1. (virtual address 00001000)
; Virtual size : 000137D0 ( 79824.)
; Section size in file : 00013800 ( 79872.)
; Offset to raw data for section: 00000400
; Flags 60500060: Text Data Executable Readable
; Alignment : 16 bytes.text:00401000 sub_401000 proc near
.text:00401000
.text:00401000 lpTopLevelExceptionFilter= dword ptr -3Ch
.text:00401000 var_38= dword ptr -38h
.text:00401000 var_34= dword ptr -34h
.text:00401000 var_30= dword ptr -30h
.text:00401000 var_2C= dword ptr -2Ch
.text:00401000 var_14= byte ptr -14h
.text:00401000 var_10= dword ptr -10h
.text:00401000
.text:00401000 push ebx
.text:00401001 sub esp, 38h
.text:00401004 mov eax, ds:off_417D40
.text:00401009 test eax, eax
.text:0040100B jz short loc_401029
We already know the information at the start, thanks to our static analysis.
We can see that this function is “near” the start function, indicating that it must be one of the first called/executed functions.
The “lpTopLevelExceptionFilter” is something to note as it is an anti-reversing technique employed by the Malware author. We will cover this in a moment.
After that we see variables being created but with no values.
Next, we see the “push ebx” which will push ebx onto the stack but I can’t see what ebx contains.
Further down we see “eax, ds:off_417D40” ( which stores the memory address at the data segment of off_417D40 into eax).
test eax, eax will then set the zero flag to 1, so that the jz short loc_401029 will be true, if the zero flag is set to 0 then it will jump to location 0040100D.
Now, the off_417D40 is the location of “tls_callback” which is used as an ant-debugging technique, (https://isc.sans.edu/diary/How+Malware+Defends+Itself+Using+TLS+Callback+Functions/6655)
(Note- I am hoping to demonstrate these techniques when I go through the debugging process of this binary)
If we skip past these, we arrive at the following function: sub_40C350-
.text:0040C350 sub_40C350 proc near
.text:0040C350 pushf
.text:0040C351 pushf
.text:0040C352 pop eax
.text:0040C353 mov edx, eax
.text:0040C355 xor eax, 200000h
.text:0040C35A push eax
.text:0040C35B popf
.text:0040C35C pushf
.text:0040C35D pop eax
.text:0040C35E popf
.text:0040C35F xor eax, edx
.text:0040C361 test eax, 200000h
.text:0040C366 jz locret_40C411
Now in the above, I’ve highlighted xor, a bitwirse operation which will do the following — eax = eax ^200000h (at the moment I can’t tell what 200000h signifies) and then it will clear eax.

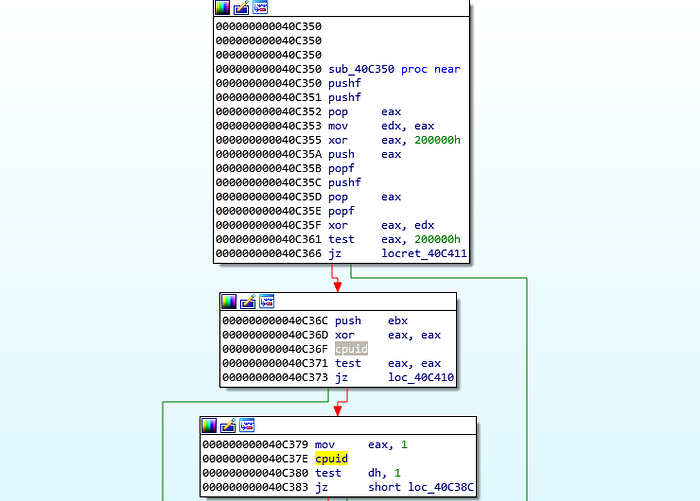
Now, I’m not too sure what the binary is doing at the start here but if we look further down we see it is getting the cpuid and then testing it against 1 (and then 2,3,4 which you can’t see as I’ve not added it here :) )
It’s trying to compare the result of the cpuid dh (dh being the higher 8 bits of the ax register, which is the lower 16 bits of eax).
Also, after reading through https://c9x.me/x86/html/file_module_x86_id_45.html to get more information on the above, I have a feeling that the xor eax, 2000000h is trying to find out the cpuid.
After the binary has found the “cpuid” it’s looking for, it then returns.

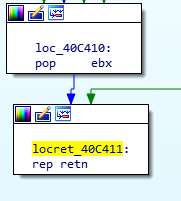
One thing I noted, was before the “rep retn”, we see pop ebx, which means the value at the top of the stack is popped to ebx, the above pop won’t happen if the very first “if” is not true (test exa, 2000000h”).
So I’ll rename this function to “get_cpuid”.

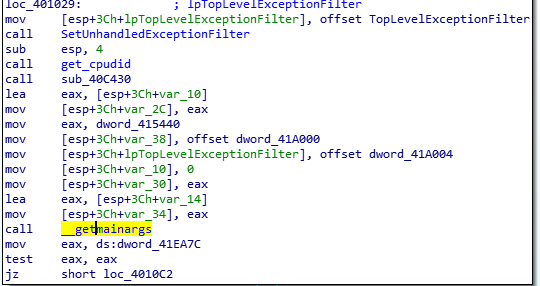
The next set of instructions look to be setting the variables that have been declared above and then it calls “getmainargs” (https://docs.microsoft.com/en-us/cpp/c-runtime-library/getmainargs-wgetmainargs?view=msvc-160) I noticed the return value for “getmainargs” — “0 if successful; a negative value if unsuccessful.”
Assuming that the return value is stored in “dword_41EA7C”, then copied into “eax”.
It will do “test eax,eax” to see if the zflag is set or not.
If it is calling “getmainargs”, that indicates that the binary is being fed arguments. Also if the zflag is not set, then it does the following:

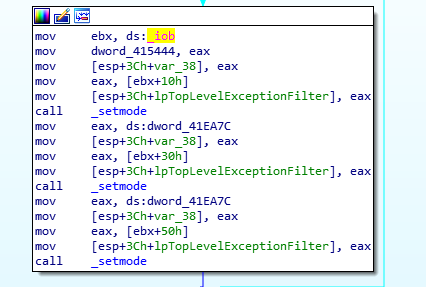
We see ebx being utilized here, also. So I feel that this process is to set the correct environment variables for the target machine.
End
This is only the end for the starting analysis of this binary, going through it instruction by instruction and then writing about it will take a long time.
So in the next write-up, I’m only going to write up about what we saw during our dynamic analysis.
Comments
Post a Comment