A highly targeted phishing campaign has been hitting hotel guests across Luxembourg. Originally flagged by the Computer Incident Response Center Luxembourg (CIRCL), this campaign stands out not because of advanced malware, but because of its impeccable contextual credibility . Threat actors aren't guessing targets; they are hitting actual hotel guests on WhatsApp with exact, legitimate booking details to steal credit card data. As part of a technical review into the infrastructure, we analyzed a recent Indicator of Compromise (IoC) linked to this campaign: [https://stay-hotel607923.com](https://stay-hotel607923.com) . Here is the deep dive into how this attack works, the infrastructure behind it, and how to track it. The Attack Workflow: Smishing with Context Most phishing campaigns rely on volume, hoping a small fraction of a massive email list bites. This campaign relies on precision. The Data Exposure: CIRCL assesses that the campaign's source data may originate from servi...
Debugging
In this write-up, I want to bypass some checks our binary does. I’ll be using x32dbg…..Well…let’s just dive straight in.
Debugging a bitcoin miner
From the previous analysis, we know we need to concentrate on bypassing the following 2 conditions:

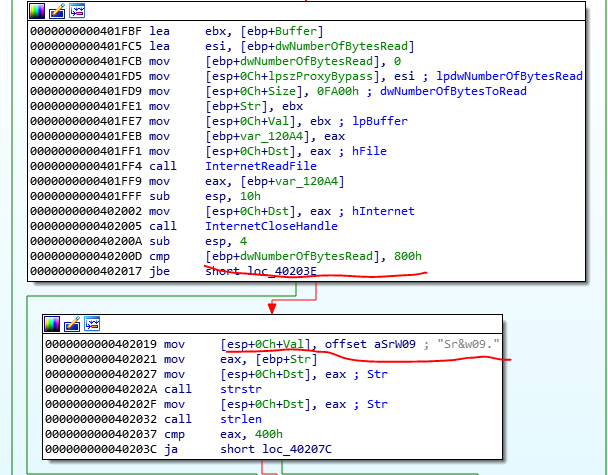
So let’s load the binary into x32dbg and set 2 breaks points, one at each condition:

but I will skip the first condition by filling the condition with NOPs:

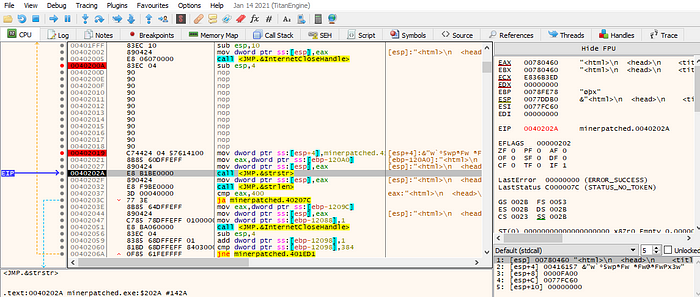
This way, we can bypass the size check.
Just before the call to “strstr”, we can see that “haystack” and “needle” being passed in, which is something I covered in the last writeup.
As I tried to continue to see what will happen (before changing the passed arguments), I recevied an “expection_access_violation” —

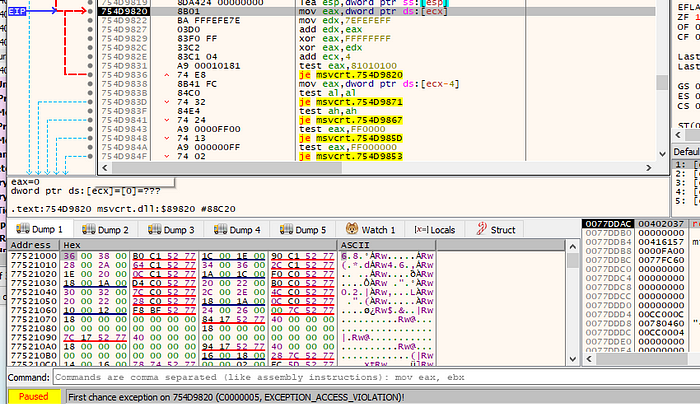
After a bit of researching and going through each instruction step by step, I found that the instruction causing the issue:
test ecx,3 — and the problem was that ecx held no value which looks to have caused the violation. This will be due to the Malware getting a HTTP response it’s not expecting.
I had put in a value that I saw it used in a previous test: sjlj_once and then I was able to get past it, but I had hit “run” and then got the following error :

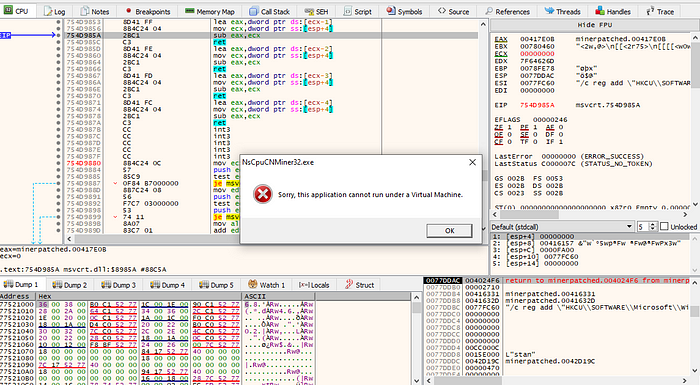
From here we see the name: “NsCpuCNMiner32.exe. Now if you Google the exe you will find a lot of information about this miner.
Now, thankfully I had Wireshark running which shows:

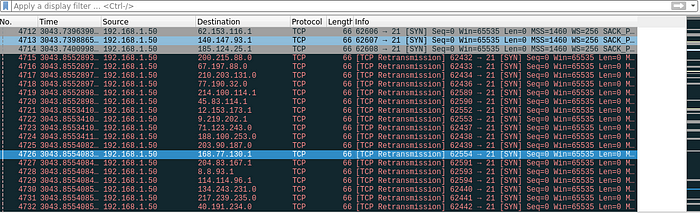
From the research I did on this Malware, I can tell that it’s trying to find an open FTP port (21) across the internet and if it can log in, it will copy itself to that machine! This could explain all the username and password strings we saw in our static analysis. (This shows the importance of running Malware within a secure network!)
Comments
Post a Comment